Showing posts with label Work of Art. Show all posts

Wednesday, September 24, 2014

So Many People to Thank

What do you do when you need to make a large number of thank you cards, but you don't have a lot of time to dedicate to making them?  Here is my method for getting a lot of cards done in a couple of hours.

First, I use my computer to help me write the messages efficiently.  Using the label templates in Microsoft Word, I set up my document so that it has four postcards per page.  Then I type my messages on the postcards.  I print the post cards on a light colour of cardstock, then cut the cardstock into quarters (4-1/4 by 5-1/2) and they're ready to stamp!

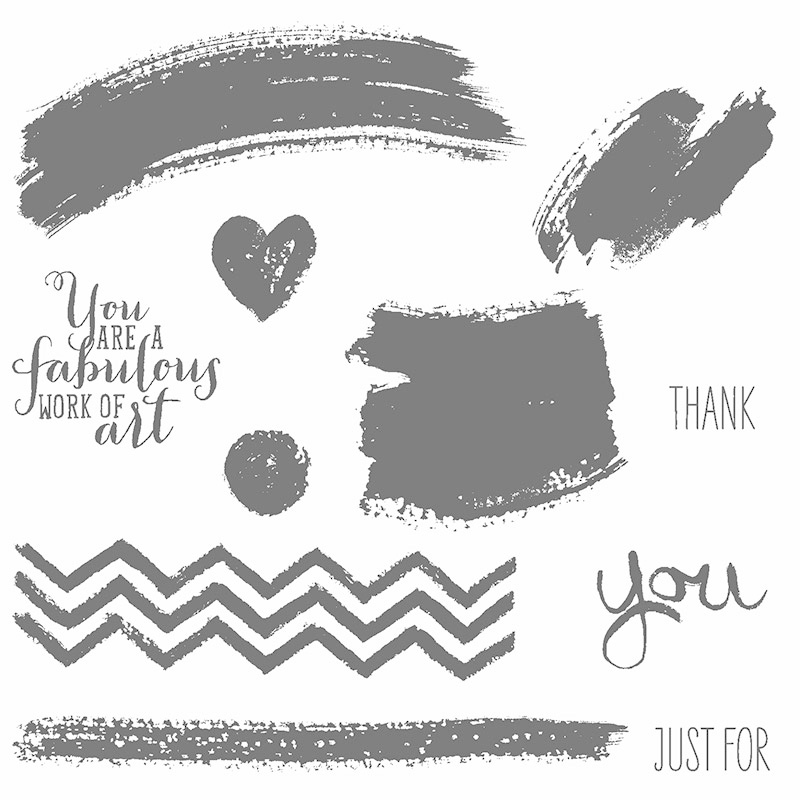
I try to design the front of the card to have no extra layers, though sometimes I'll have one or two punched layers.  The Work of Art stamp set made this easy since there are so many ways these images look great without extra embellishments.


This layout is simple, but effective.  I was able to get the 25 cards I needed done in a little over an hour start to finish.  I feel sure that the people I wanted to thank will know how much I appreciate them when they receive their hand stamped card.  Combining technology and paper crafting allowed me to express myself creatively, even when my time was limited.  Is this a strategy that could help you too?

Go stamp something!
Diane

Tuesday, August 5, 2014

Work of Art

For our Stamping 101 class tonight, I decided we would try using one stamp set three ways. I have been seeing this stamp set used in so many creative ways, so I chose three and off we went. 

The star of tonight's class: Work of Art


This was the design with the most steps, so we made this one first:


I got this idea from Dawn Olchefske A.K.A. DoStampingWithDawn. She even has a video showing you how to make it!  The only things we did differently, is our card base is Crumb Cake and we used one less layer than she did.

Our next card had less steps, but is sooo cute!


I think this is my favorite project tonight!  I've seen many versions of watermelon cards on blogs and Pinterest.  For this one we used Strawberry Slush, Wild Wasabi, and Momento Black inks, and the same colours of card stock. The little seeds are cut out, but you could also draw them in with a fine tip black marker. 

Our third project was even simpler:


We used Wild Wasabi for the stem, Soft Suede for the centre of the flower and the sentiment, and So Saffron for the flower petals on a Wasabi card base.

When we were done, there was one lonely little stamp still in the box. We had to use him for something so...


The heart petals are stamped in Strawberry Slush, and the  flower centre in Soft Suede. The image is punched out with the scallop circle punch and attached to the lollipop with a glue dot. 

Four great projects, one great stamp set. 

Go stamp something!
Diane 


Thursday, May 29, 2014

2014-2016 In Colors

The new in colors will be available starting June 2nd, and I think you're going to like these colors!

This first project uses all five of the new colors:


The base of this card in Tangerine Tangelo, the stripes are Lost Lagoon, the greeting is Mossy Meadow, the paint splotch in the bottom corner is Hello Honey, and the heart is Blackberry Bliss. The 'painted' images are all from a new stamp set called Work of Art, and the greeting is from Yippee-Skippee!


This second card also uses the new stamp set Work of Art.  The streaks of paint are in Blackberry Bliss, Hello Honey and Lost Lagoon.  The splatters are in Melon Mombo, and the sentiment is in Black StaxOn. I just Love the simplicity of this card-- Whisper White card stock, a single stamp set and a few ink pads.  I have a feeling I"ll be making more of these.


This little bag uses a sheet of Designer Series Paper from the new 4 1/2 x 6 1/2 paper stack, Moonlight.  This design features Hello Honey and Blackberry Bliss. The closure on top is also Hello Honey using one of the tag topper punches. The tiny flower is punched with the Itty Bitty Punch Pack, the stamped flower is from Petite Petals, the greeting is from Label Love. All of these are in Blackberry Bliss. 

The DSP is scored along the long side at 1", 3", 4", and 6".  It is scored along the short side at 1". This bag comes together pretty easily. Here is a link to a video of Sam Donald that shows how to make it start to finish.  Her blog is full of wide variety of boxes and bags.  When I need a packaging idea that's where I look first.

I hope you've enjoyed this small taste of the 2014-2016 In-colours, there will be much more coming!

Go stamp something!
Diane