Friday, November 21, 2014

Keeping it Clean

The challenge over on The Paper Plunge this week is clean and simple. Here's my contribution:


This card uses the Wintertime stamp set. It's simply stamped in VersaMark ink and heat embossed with white embossing powder and dazzling diamonds glitter. I added a few rhinestone jewels to finish it off. It doesn't get much simpler than that!

Here's a second version using different stamps:


This card uses the Christmas Bauble stamp set, and the sentiment is from an old retired stamp set. 

Go stamp something simple and share it with us!
Diane

Friday, October 3, 2014

Round and Round She Goes!

This week's challenge at The Paper Plunge is to use circles in your project. Right away my mind went to Christmas tree ornaments, and so I made this:


How many circles do you think there are on this card?  Let's count. 
1) The card base is two Pool Party circles
2) The snowflakes on the background are tiny circles (Some are glittery!  Always hard to see glitter in photos.)
3) The first house has a half circle window in the door
4) The second house has a wreath on the door
5) The third house has a round attic window
6) The ornament hanger is actually the round tag from my new favourite product--the Curvy Keepsake Box Thinlets Dies

The houses and wreath are from the Holiday Home Photopolymer Stamp Set.  The houses were die cut with the Homemade Holiday Framelit Dies.  
 
Come swim with us on The Paper Plunge!  Use circles on a project and post it.  Don't have a blog?  You are welcome to share your project on my facebook page:Teachtostamp

Go stamp something!
Diane 

Friday, September 26, 2014

Fall is just another way of saying PLUNGE!

Exciting news!  I have been asked to be a part of the design team at a new weekly challenge site called, The Paper Plunge!  For our first challenge we're making fall themed projects. Here is my card:


I love it when our products can be used in different ways!  The stamp set White Christmas instantly makes us think of different winter scenes we could create with it. When I was looking around the stamping sites, I saw a few people were using the tree image for autumn cards, by adding leaves with a variety of techniques. I chose to stamp the snow image from the same set in Cajun Craze ink, and then stamp the small splatter image from Gorgeous Grunge in Crushed Curry ink using a mask to protect the rest of my card. You could use the snow image for both colours, but I don't like to clean my stamps until I'm putting everything away if I can help it!The sentiment is from the Holiday Invitation stamp set.  I stamped it in Chocolate Chip in a 1/2" wide scrap of Whisper White, then I trimmed the end with my Paper Snips and attached it with Stampin' Dimensionals.  The white panel was then mounted onto a 4-1/8" square of Island Indigo and finally onto a Cajun Craze 4-1/2" card base. 

Check out the other designs at: The Paper Plunge

Take the challenge, and go stamp something!
Diane


Wednesday, September 24, 2014

So Many People to Thank

What do you do when you need to make a large number of thank you cards, but you don't have a lot of time to dedicate to making them?  Here is my method for getting a lot of cards done in a couple of hours.

First, I use my computer to help me write the messages efficiently.  Using the label templates in Microsoft Word, I set up my document so that it has four postcards per page.  Then I type my messages on the postcards.  I print the post cards on a light colour of cardstock, then cut the cardstock into quarters (4-1/4 by 5-1/2) and they're ready to stamp!

I try to design the front of the card to have no extra layers, though sometimes I'll have one or two punched layers.  The Work of Art stamp set made this easy since there are so many ways these images look great without extra embellishments.


This layout is simple, but effective.  I was able to get the 25 cards I needed done in a little over an hour start to finish.  I feel sure that the people I wanted to thank will know how much I appreciate them when they receive their hand stamped card.  Combining technology and paper crafting allowed me to express myself creatively, even when my time was limited.  Is this a strategy that could help you too?

Go stamp something!
Diane

Tuesday, August 12, 2014

Big Shot Bundle: Bright & Beautiful

Have you heard about the amazing promotion Stampin' Up! is running in August?

 
Today my Holiday Catalogue preorder arrived, and with it the Bright & Beautiful Stars Bundle.  I couldn't wait to ink those stamps and run the images through my Big Shot with the coordinating Star Framelits Dies!  Here's what I made:


Framelit Dies make projects like this one quick and fuss free. I used Garden Green, Early Espresso, and Cherry Cobbler to stamp, then placed the card stock on the cutting plate and magnetic platform like this:
 

Place the second cutting plate on top, roll through the Big Shot and assemble your card. This card base is Crumb Cake, the designer series paper if from a paper stack that is in the Holiday Cataligue called Trim the Tree (let me know if you need a Holiday Catalogue, I have them here).  I attached the top two star layers with Dimensionals to add a little height, and I curled the sentiment with my fingers a little to make it more like a banner or scroll. 

Look forward to seeing more projects using this stamp set and the Star Framelit Dies, I'm not done with these yet!
 
Go stamp something!
Diane

Tuesday, August 5, 2014

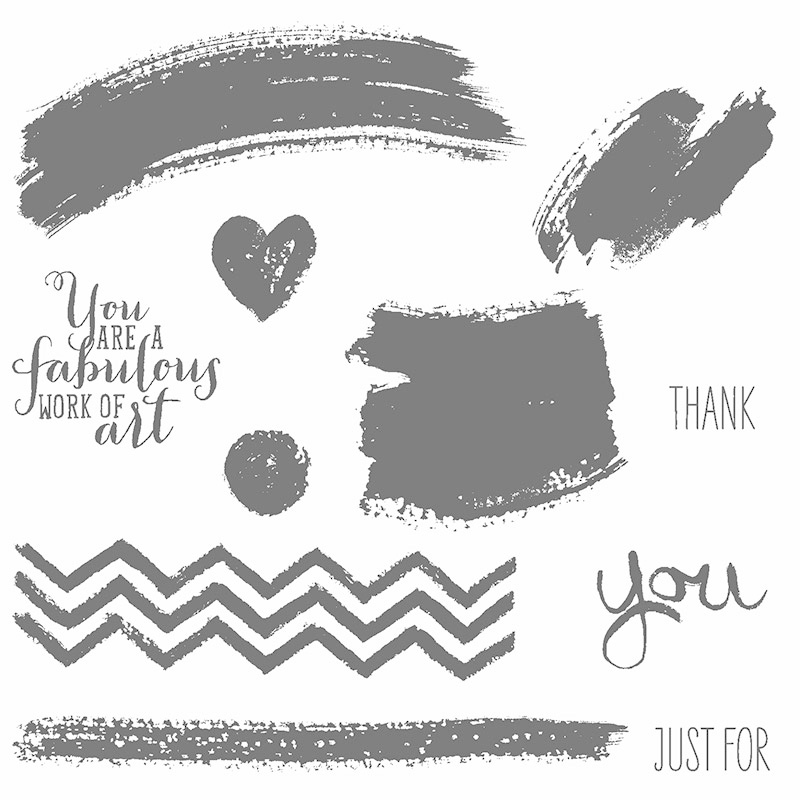
Work of Art

For our Stamping 101 class tonight, I decided we would try using one stamp set three ways. I have been seeing this stamp set used in so many creative ways, so I chose three and off we went. 

The star of tonight's class: Work of Art


This was the design with the most steps, so we made this one first:


I got this idea from Dawn Olchefske A.K.A. DoStampingWithDawn. She even has a video showing you how to make it!  The only things we did differently, is our card base is Crumb Cake and we used one less layer than she did.

Our next card had less steps, but is sooo cute!


I think this is my favorite project tonight!  I've seen many versions of watermelon cards on blogs and Pinterest.  For this one we used Strawberry Slush, Wild Wasabi, and Momento Black inks, and the same colours of card stock. The little seeds are cut out, but you could also draw them in with a fine tip black marker. 

Our third project was even simpler:


We used Wild Wasabi for the stem, Soft Suede for the centre of the flower and the sentiment, and So Saffron for the flower petals on a Wasabi card base.

When we were done, there was one lonely little stamp still in the box. We had to use him for something so...


The heart petals are stamped in Strawberry Slush, and the  flower centre in Soft Suede. The image is punched out with the scallop circle punch and attached to the lollipop with a glue dot. 

Four great projects, one great stamp set. 

Go stamp something!
Diane 


Friday, July 25, 2014

I didn't realize how easy, fast and cost effective Project Life by Stampin' Up! really is!!

Hi Stampers,

So when Stampin' Up! announced they were partnering with Becky Higgins and Project Life I thought, "That's pretty smart, it'll be a lot faster and easier than traditional scrapbooking."  That's true, but I didn't realize how true until I made a few pages at the Stampin' Up! convention in Salt Lake City last week.

So they talked about Project Life by Stampin' Up! in the opening presentation, and Becky Higgins was there and Shelli interviewed her on stage, and she seemed really cool, and everything she said resonated about getting those memories saved in a quick and easy way so that when you're busy living life, you can still keep up with preserving those memories in albums that are cute and reflect your style.

Then I went to the Product Playground and a Stampin' Up! employee presented me with a pocket page, a couple of cute cards to slide in and the Project Life Remember This stamp set.  I made this  page in under 60 seconds, Step one: stamp  Step two:slide into pockets:


Insane right?!?  Simple, but cute, and only took a minute to complete. (Imagine that piece of cardstock at the bottom is actually a photo and under a day to remember I've written something about that photo.)  So now I'm getting a little more excited about this product line.  The truth is I bought the Everyday Adventure Project Life Card Collection and the Accessory Pack, but was thinking about using the products to make cards and tags, now I'm starting to think memory keeping is a better idea!  Here are some of the adorable cards in this set:

http://www.stampinup.com/ECWeb/ProductDetails.aspx?productID=137345&dbwsdemoid=2040904

Then we go to a make and take class where we make these two pages in less than 10 minutes:


That includes punching things out, finding and applying stickers from the substantial accessory pack, stamping, stapling, everything.  All that's left is to find a couple of pictures and do a little journaling.  I was amazed.

Then I started doing the math.  This style of memory keeping is WAY cheaper than traditional scrapbooking, AND everything is contained inside this little box until you need it (no more bins and containers of supplies!)  To get the 6" x 8" album, a packet of 12 pocket pages and a box of 100 cards is only $39.95 (Canadian dollars, plus shipping and tax) and the 12" x 12" Black Faux Leather album, a packet of 12 pocket pages and a box of 100 cards is only $65.40!  That wouldn't even make a dent in the bill for all of the supplies used in traditional scrapbooking!


Another feature I love, is that you actually don't need to have a creative bone in your body or be considered crafty at all, because if you want to simply slide in your photos, and fill the rest of the pockets with the colour-coordinated cards you can, and it looks great!  If you like to add your own little touches, you can use the accessory packs or whatever crafting supplies you already own and add some extra embellishments to make it your own.  This makes this style of memory keeping accessible to everyone who has photos.  Love that!!

Can you tell I'm excited about this?  I want to get this into the hands of everybody who needs to do something with their photos.  I'm planning to have some classes here, so if you live anywhere near Richmond, BC please come!  If not, but you're interested in learning more please contact me and I can provide you with more information.  Let's spend more time making memories, and stress less about how to preserve them!!

Go stamp something!
Diane

Thursday, May 29, 2014

2014-2016 In Colors

The new in colors will be available starting June 2nd, and I think you're going to like these colors!

This first project uses all five of the new colors:


The base of this card in Tangerine Tangelo, the stripes are Lost Lagoon, the greeting is Mossy Meadow, the paint splotch in the bottom corner is Hello Honey, and the heart is Blackberry Bliss. The 'painted' images are all from a new stamp set called Work of Art, and the greeting is from Yippee-Skippee!


This second card also uses the new stamp set Work of Art.  The streaks of paint are in Blackberry Bliss, Hello Honey and Lost Lagoon.  The splatters are in Melon Mombo, and the sentiment is in Black StaxOn. I just Love the simplicity of this card-- Whisper White card stock, a single stamp set and a few ink pads.  I have a feeling I"ll be making more of these.


This little bag uses a sheet of Designer Series Paper from the new 4 1/2 x 6 1/2 paper stack, Moonlight.  This design features Hello Honey and Blackberry Bliss. The closure on top is also Hello Honey using one of the tag topper punches. The tiny flower is punched with the Itty Bitty Punch Pack, the stamped flower is from Petite Petals, the greeting is from Label Love. All of these are in Blackberry Bliss. 

The DSP is scored along the long side at 1", 3", 4", and 6".  It is scored along the short side at 1". This bag comes together pretty easily. Here is a link to a video of Sam Donald that shows how to make it start to finish.  Her blog is full of wide variety of boxes and bags.  When I need a packaging idea that's where I look first.

I hope you've enjoyed this small taste of the 2014-2016 In-colours, there will be much more coming!

Go stamp something!
Diane


Tuesday, May 13, 2014

Stamp Club

Hi Stampers,

I'm a bit behind schedule here on the blog, but I wanted to make sure to share these projects with you.
First up, a neutral card using one of our Hostess Sets, Postage Collection.  The neutral colour combination, Crumb Cake and Very Vanilla, ended up giving this card an old fashion kind of feel:


Our second project is a colourful shaped card using our Floral Frames Collection framelits.  Cute and fun!!  This card uses the Flower Shop stamp set as well as a greeting from the  Itty Bitty Banners stamp set.


Here's a stepped up version. On this card I embossed each of the layers before adhering them.  I used a variety of embossing folders, in fact almost any of our embossing folders could work.


Lastly, our 3D project,


Just in time for Easter we used the Angled Tag Topper Punch and the Oval Designer Frame Embossing Folder combined with the Extra Large Oval Punch to make the window for this chocolate easter egg holder.  We tied it together with a little stitched ribbon and a couple of flowers from Petite Petals in colours that coordinated with our chocolate egg wrapper.

Stay tuned, in the next few days I'll be posting some projects using sneak peak products from the upcoming 2014-2015 catalogue which will be released in June...some great things are coming!

Go stamp something!
 

Monday, April 21, 2014

Retiring Items and Free Shipping

Hi Stampers,

Today Stampin' Up! announced which items from the current catalogue are retiring.  These items are available while quantities last, so if there is something you've had your eye on, order it now before it's gone!  Click on the graphic below to browse the retired items or to place your order.  If you prefer a list email me and I'll send you a pdf.  If you order from the online store please enter the hostess code 9G2U7BBB on the bottom left of the check out screen.

http://www.stampinup.com/ECWeb/ItemList.aspx?categoryid=1895&dbwsdemoid=2040904

To sweeten the deal, Stampin' Up! is also offering free shipping on all orders placed until Friday, so get on line and place your order right away!


Go stamp something!
Diane


Wednesday, April 16, 2014

Stamping 101


This class focused on two current paper crafting trends; water colouring and gold. Both cards use the stamp set Happy Watercolor:


We stamped the colour wash image three times in Wisteria Wonder, then stamped the sentiment in Jet Black StazOn. The flowers were punched with the Petite Petals Punch, the tiny gold flowers were punched with the Itty Bitty Punch Pack. A little Rhinestone Jewel is added to the centre of each gold flower and the leaves were made with the Little Leaves Sizzlit and the Big Shot.


For our second card we used a technique called emboss resist. We stamped the floral image with Versa Mark ink and heat embossed it with White Embossing Powder. Then we painted over the image with an Aqua Painter and ink from the lid of our classic ink pads in the 2013-2015 in-colors. We attached a strip of the gold striped design from the washi tape collection; Watercolor Wonder. We stamped thank you, also from Happy Watercolor, directly onto the wash tape with Jet Black StazOn. Once the floral panel was dry, we attached it to the card with two pieces of the gold polka dot design from the same collection. Fast and easy, and it looks better in real life.  Gold is tricky to photograph!

Our third project was a simple little gift box, but since I forgot to take a photo of it, I'll have to save that idea for another post.
 
Go stamp something!
Diane

Saturday, March 29, 2014

Stamp Club


This month for stamp club we tried something a bit different. We used a template created by Angie Kennedy Juda to make five projects from one sheet of 12 x 12 Designer Series Paper. Here are the five projects we made:
 

This is the cutting template that Angie came up with:
 

Each stamp club member chose a different sheet of Sweet Sorbet DSP and cut it according to the template above and then scored the 3D projects. In addition to the designer paper we used card stock in Crisp Cantelope, Pistaccio Pudding, Pool Party and Summer Starfruit. We used ink pads in the same colours. 
 
Project #1  Treat Bag


For this project we also used a bit of ribbon and linen thread to hold the bag closed at the top. The sentiment is from the stamp set Perfect Pennants. The layers were cut with the Banners Framelits.  The photo on the right is the scoring guide for this treat bag.

Project #2  Pizza Box

 
The pizza box is topped with a cupcake made using the Cupcake Punch layered onto a Pool Party circle and Pistachio Pudding scallop circle.  In the photo on the right the dashed lines show where to score, the solid lines show where to cut.
 
Project #3  Tiny Triangle Box
 

We stamped a flower image from Petite Petals and punched it out with the coordinating punch.  The flower is layered onto a Pistachio Pudding circle and Pool Party scallop circle.  The box is tied shut with a bit of ribbon through tiny holes we punched in the top. 

Project #4  Thank You Card


This card uses the three thin strips of DSP.  We  cut a notch out of each end, and adhered them to the front, and folded over to the inside of the card.  For the focal image we stamped the smaller flower image from So Very Grateful and coloured it in with blender pens and ink from our ink pads. If you've never tried this before all you do is press the centre of your ink pad when it is closed, some of the ink will be transferred to the lid. Pick up the ink from the lid with your blender pen like it's a paint palette. We cut the image out with the Circle Framelits and layered it onto a punched out Crisp Cantaloupe scallop circle, and a Pool Party banner.

Project #5  Make a Wish Card


We used the 2" x 5 1/2" piece of DSP on this last project.  We stamped make a wish from Perfect Pennants in Pool Party and cut out all of the layers with the Banner Framelits.  The final embellishment were a bit of Pool Party Ruffled Ribbon attached with a Silver Brad, and an Itty Bitty punched flower in Summer Starfruit with a Rhinestone centre.

This class was a bit more involved than our typical stamp club class, but I just love the versatility of a concept like this one sheet wonder as it can be used with any designer paper you may have and whatever stamp sets suit the occasion you are making the projects for.  This also gives you great value for your Designer Paper!  The five projects can also be used individually, simply use the size of paper indicated in the template for the project you'd like to make and follow the scoring guide.

Go stamp something!
Diane


Wednesday, March 12, 2014

Stamping 101

Hi Stampers,

The first Tuesday of every month we have a Stamping 101 class where we make three projects that use simple techniques to produce quick, yet beautiful items. This month we made two cards and a treat holder. 


The first card used the Decorative Dots Textured Embossing Folder from the Saleabration brochure. The three stamps we used were all from different sets; the diagonal stripe image is from Gorgeous Grunge, the sentiment is from Create a Cupcake, and the flower and the coordinating punch are from the Petite Petals bundle. We used Very Vanilla and Strawberry Slush card stock and Early Espresso ink. 


The second card features the Designer Series Paper from Saleabration, Sweet Sorbet. The stamped image is from Perfect Pennants and we cut it out with the coordinating framelits and the Big Shot. The card stock layers are Crisp Cantelope and Pistacio Pudding. This was our fastest project, I think this card came together in about five minutes. 


Our last project was this Ghiradeli chocolate holder. We used the Envelope Punch Board to get the file tab shape at the top. The image on the front, from Apothecary Art, was stamped twice. The bottom layer was stamped in Coastal Cabana and cut out with the coordinating framelits, then it was stamped again in Wisteria Wonder from which we cut out the centre of the image with the circle framelits. We then used Stampin' Write markers in Daffodil Delight and Pear Pizzaz to colour the flowers and leaves. So cute!!

If you're interested in any of the Saleabration items they are available until March 31st. Contact me if you need a brochure. 

Go stamp something!
Diane

Wednesday, February 19, 2014

Stamp Club Mini Album

Hi Stampers!

At stamp club we usually make three projects, and each project focuses on a certain product or technique. Once in a while I like to do a larger scrapbook project instead. The scrapbooking members like to get some ideas for their memory keeping, and the card makers like to try something new and go home with a photo ready scrapbook project. 

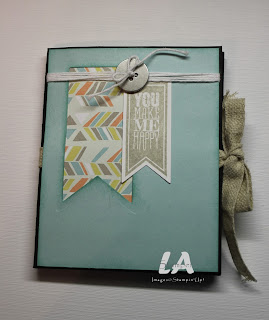
This month we're using a template I found on LA Stamper for a mini scrapbook using a 12x12 piece of card stock as the base. Here's her mini scrapbook, and the scoring and cutting template.  Click on the photo to see her post:

http://www.lastamper.blogspot.ca/2014/01/sale-bration-soup-stamps.html  
 
For our stamp club project I wanted to use the Sale-a-bration DSP, so that set the colour palette. I added Crumb Cake for the base, and Primrose Petals as an additional accent colour. 

 
For the cover we embossed a 3 1/2 x 4 1/2 piece of Pool Party card stock. (All panels are decorated with 3 1/2" x 4 1/2" layer)  Then we cut out a piece of Sweet Sorbet DSP with the Banners Framelits Dies and an image from the coordinating Perfect Pennants Stamp Set with the same framelits. Those two banners are attached to the Pool Party base with Retro Fresh Designer Washi Tape
 
 
When you open the cover, you reveal a pocket on the left and a photo panel on the right. The pocket has some Sweet Sorbet DSP attached, and the corners have been rounded. The photo panel has  a Summer Starfruit layer and two circles cut out with the Circle Framelits and glued only on the back and the edge near the fold so that a photo can be slipped underneath. The Pistachio Pudding circle is embellished with a flower from Banner Blast stamped in Primrose Petals. The Pool Party circle is stamped with an image from Perfect Pennants in Jet Black StazOn ink. 


When you open the Starfruit panel you reveal two photo/journaling panels. The Primrose Petals panel is embellished with an image from Petite Petals punched out with the coordinating Petite Petals Punch, and the hello from Perfect Pennants is stamped in Cantelope . The Crisp Cantelope panel is stamped with a diagonal striped banner image from Perfect Pennants in Primrose ink, the little banner and star are from Banner Blast and punched out with the Banner Punch, both free during Sale-a-bration!


When you flip those two panels down, you reveal the last four photo/journaling panels. Three more designs from the Sweet Sorbet DSP are used here, along with a piece of Pistachio Pudding. 

The flap over the top middle panel has an image from Perfect Pennants stamped in Pool Party and cut out with the coordinating Banners Framelits, mounted on a Summer Starfruit banner and a slim strip of Primrose card stock.  The flap over the right top panel was left plain, as I intend to mount a photo onto the flap, and a second photo underneath it on the DSP layer.

The bottom left panel simply has a strip of Crumb Cake card stock embossed with the Decorative Dots embossing folder, also free during Sale-a-bration. The bottom right panel has been stamped all over with the small splatter image from Gorgeous Grunge in Pustachio Pudding ink. Three different images from Banner Blast were stamped in Starfruit, Cantelope and Primrose, and punched out with the coordinating  Banner Punch, yes, both are free during Sale-a-bration.

Whew!  That was a lot of explanation for one project!  The truth is, once the paper is cut it comes together pretty quickly, the club stampers completed their scrapbooks in an hour. All that's left is to print out some pictures! 

If you'd like to get in on Sale-a-bration and have some of these free products to use in your paper crafting, contact me and I will get you a copy of the brochure. Can't wait?  Go to my Stampin' Up! website to view it online

Go stamp something!
Diane


Monday, February 10, 2014

Stamp Club

Hi Stampers,

We had our stamp club class last week, and we inked up some new products from the Occasion Catalogue and the Sale-a-bration flyer:


This card features the Starburst Sayings Bundle from the Occasions Catalogue and Banner Blast and the coordinating Banner punch from Sale-a-bration


The colour palette for this Valentine was inspired by the Sale-a-bration DSP Sweet Sorbet that you see running up the left side of the card.  It's great paper!  The base is Summer Starfruit, the next layer is  Pool Party and the heart is Calypso Coral.  We used the Hearts a Flutter stamp set and the coodinating framelits on the Calypso heart and to stamp the heart on the white layer.  I like that this card can be used as a valentine, and isn't too frilly or girly.

Good as Gold Simply Sent kit sneak peek Sale-A-Bration 2014, papermadeprettier

We also made a card from the Sale-a-bration card kit, Good as Gold Simply Sent, but I gave it away the day after stamp club for a friend's birthday and I hadn't taken a picture yet.  This is a picture I found on line that is similar to what we made, only I put the thin blue strip in between the gold strip and the for you.  Have some questions about Sale-a-bration and how you can get these items for free?  Email me at teachtostamp.gmail.com and I can answer your questions and get a copy of the flyer to you.

Go stamp something!
Diane